Getting started
This article assumes you have at least a small amount of Linux knowledge and know how to enter basic commands into putty.
First of all your will need root access to your VPS or dedicated server with Debian 9 (stretch) installed. It is recommend you start with a clean copy of Debian 9 when following this guide. This guide assumes you have root access, therefore sudo is omitted. If you do not have root access, prefix each command with sudo.
What you will need:
- putty- https://www.putty.org/
- VPS with root access.
- If you prefer not to use nano you can use WinSCP to edit files in a GUI editor https://winscp.net/eng/download.php
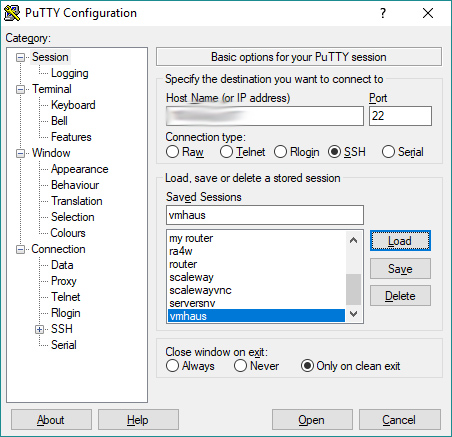
Connect to your server using putty
Enter your IP address in the top field, leave the port default as 22 unless you have changed it and then press open. You will be prompted to enter your username and password. The username is normally root when you first configure your VPS.
Get up to date
We first need to make sure Debian 9 is fully up to date, run the following commands:
apt-get update

apt-get upgrade

apt-get install nano
Installing Nginx (mainline)
In this guide we will install the latest version of Nginx, the mainline version. Run the following commands in order:
wget http://nginx.org/keys/nginx_signing.key

apt-key add nginx_signing.key

rm nginx_signing.key

nano /etc/apt/sources.list
User the down arrow on your keyboard to go all the way to the bottom of the file.
We need to append the following lines to the sources.list, copy the following lines and right click on putty to paste (don’t press ctrl/cmd + v):
deb http://nginx.org/packages/mainline/debian/ stretch nginx

deb-src http://nginx.org/packages/mainline/debian/ stretch nginx
press ctrl + o to write the file then press ctrl + x to close the file
Run the following commands:
apt-get update

apt-get install nginx
Congrats you have now installed nginx!
You can restart Nginx using the following command:
service nginx restart
Warning: you may need to remove or stop apache2 if nginx is failing to start
You can remove apache2 with the following commands if nginx is failing to start:
service apache2 stop

apt-get --purge remove apache2

apt-get autoremove
Lets install PHP 7.2 now with FPM
Run the following commands:
apt install ca-certificates apt-transport-https

wget -q https://packages.sury.org/php/apt.gpg -O- | apt-key add -

echo "deb https://packages.sury.org/php/ stretch main" | tee /etc/apt/sources.list.d/php.list

apt update

apt install php7.2
There are a few PHP modules that will come in handy, so lets install these also:
apt install php7.2-fpm php7.2-common php7.2-curl php7.2-gd php7.2-json php7.2-mbstring php7.2-mysql php7.2-xml
Congratulations you have now installed PHP 7.2! Easy right?
Install MySQL (Percona DB)
Percona DB is a great distribution of MySQL, so lets install it.
Run the following commands:
wget https://repo.percona.com/apt/percona-release_0.1-6.$(lsb_release -sc)_all.deb

dpkg -i percona-release_0.1-6.$(lsb_release -sc)_all.deb

apt-get update

apt-get install percona-server-server-5.7
Follow the installer through, you will need to enter a root password. Make sure it’s long, random and secure. You should also make note of this password as you’ll need it to login and configure MySQL. Do not make the password the same as your VPS login!
Congrats you have now installed MySQL
We need to configure nginx to be on the same user as PHP. Nginx is probably running as the user nginx currently, lets make it run as www-data which is the same user PHP will be running as to make things easier.
Run the following command:
nano /etc/nginx/nginx.conf
Navigate to the line user by using the arrow keys on your keyboard and delete nginx and replace it with www-data
Now Press ctrl+o then ctrl+x. This will save(write) and exit the file.
Run the following command:
service nginx restart
Setting up phpMyAdmin
This is a relative insecure setup of phpMyAdmin and I don’t recommend it for production use. You should protect your phpMyAdmin installation by whitelisting only you IP to access it and additionally have nginx basic authentication protecting it but for this guide we shall disregard this. But please beware that this is not very secure!
Run the following commands:
apt-get install unzip
cd /var
mkdir wwww
cd www
wget https://files.phpmyadmin.net/phpMyAdmin/4.8.2/phpMyAdmin-4.8.2-all-languages.zip
unzip phpMyAdmin-4.8.2-all-languages.zip
You can rename the unzipped directory to phpMyAdmin just to make things easier. If you know how to use .tar you may prefer to download that version.
Connecting Nginx, PHP and phpMyAdmin all together
This is where we need to create a server .conf file for nginx to read.
Create a new file called phpmyadmin.conf in /etc/nginx/conf.d/ you can either use nano or WinSCP. Hopefully you’ve picked up the nano skills by this point or got used to WinSCP.
Here is an example phpmyadmin.conf this should allow you to access phpMyAdmin from a web browser on your VPS IP address.
phpmyadmin.conf:
server {
	listen 80;
	client_max_body_size 10M;
        # Replace localhost below with a domain or subdomain to make it easier to access.
	server_name localhost;
	root /var/www/phpMyAdmin;
	index index.php index.htm index.html;

location / {
	try_files $uri $uri/ /index.php?$args;
}

location ~ \.php$ {
	try_files $uri =404;
	fastcgi_pass unix:/run/php/php7.2-fpm.sock;
        fastcgi_param SCRIPT_FILENAME $document_root$fastcgi_script_name;
	fastcgi_index   index.php;
	include fastcgi_params;

}

}
After saving the phpmyadmin.conf run the following command:
service nginx restart
Have a go at logging in by visiting your IP address in the browser or whatever you put as the server_name variable. You will need to type root as the username and the MySQL root password you saved earlier (this is not your VPS password unless for some very insecure reason you put them the same).
Congratulations you have finished this guide!
If you spot any mistakes in this guide please let me know and I’ll fix them. This guide was mostly made from memory and some other guides on the internet.
Enjoy the music and have a break.